Wednesday, March 31, 2021

Saturday, January 30, 2021
HAND MADE RYIJY ( RYA RUG)

It is the beginning of December and once again the school has gone into lockdown due to the Corona virus. Unfortunately we can't go to school to continue our studies, so for this next course in our curriculum we have to chose something that can be made at home.
This landed up being a blessing in disguise for me. I knew immediately what I would make. I have for years wanted to make a ryijy. While we still lived in Canada I had looked into ordering a ryijy kit from Finland and making one. Unfortunately the cost of these kits was astronomical. The kit with pattern and wool were approx. $1200 -1500 Canadian dollars. So, now I would have the opportunity to design it myself and make it, and I had a customer who had wanted one, and who conveniently was my husband.
I spent weeks going over pictures and ideas on pinterest, and even joined a Ryijy Club on facebook. I got many wonderful ideas from both these places. So, slowly I started making a collage of pictures that we liked, and that would suit the home.
We finally decided on a pattern, colours, and size. I then went about making drawings of the pattern ideas. After one was chosen, I started making small samples of the ryijy. The customer had to decided what length he wanted the "pile" to be and how dense he wanted it.
I also looked into different types of materials to use for the base of the ryijy. I had originally wanted to purchase a pre made ryijypohjakangas that had been made specifically for this purpose.Unfortunately the cost of the material would cost between 150 -200 €. As this was going to be the first ryijy that I make, and have no experience in making one, I felt that it was too costly to use as a "guinea pig". The wool I landed up choosing for the ryijy was regular wool used in making socks and mittens. The wool count of this was 75% and 25 % acrylic the cost per 100 gr was $3.75. The reason I chose the sock wool rather than "ryijy wool" was the cost. Each 120 gr ball was going to cost between 8-13€. As I had stated earlier, with this being my first ryijy, I tried to keep the costs down as much as possible.....Now I know why the ryijy kits was so expensive.
So, with all these decisions made,the decided size was going to be 100x 140 cm ,the colours are natural white, grey, dark grey and black.
Below you will see the sample patterns that I drew and made. I decided not to put all the different choices we had to chose from, and all the drawing that I made. You will get a good ideas of the process that I went through.
The drawing below was the one that was chosen from all the pictures I drew and submitted to my customer.


The sample to the left is one that I am making for the customer to see. At the same time I got some experience of what kind of base material to chose from when making the ryijy. There are alot of different thickness and density in burlap. This one was to dense and thick. It was really hard to sew on.

Here is the completed sample. The customer was very pleased with how it looked. Other than changing the pile length which he wanted to be longer everything was satisfactory.

These are the wool colours chosen for the ryijy.

This picture to the left is a material that is made specifically for hand sewed ryijy's. Unfortunately the cost of this is 119€ per metre and I needed a 140cm. So, with this option the customer decided on the cheaper material which would be burlap.

The picture to the right is the burlap, which works fine but you have to hand pull the string out of every 5 cm of burlap. You do this because you need more space for the wool pile to be sewn in. This piece of burlap came to under 10 €.

To my left is the ryijy lanka that is typically used for making a ryijy. It is more durable and is 100% wool. Unfortunately it is expensive and costs 9.90€ per 120 gr. When you need 25 balls of wool, the costs add up quickly.

This is 7 Veljestä knitting wool that I wrote about.
The reason this wool is not used for ryijys is because it u weaves from the twist easier, and mattes easier.
I presented these different options to my customer and it was decided that we will give it a try. This ryijy will hang on the wall, and no one is going to be walking on it, so it should be just fine.

Here I am now starting to make the actual pattern that I will be following for the ryijy.

In this picture to your right I am figuring out the spaces between the coloured piles.

I finally completed my actual pattern that I will be following for the ryijy.


In these two pictures I first drew the lines where I am going to be sewing, and I also marked off every 5 cm of this area. If you look closely at the picture to my left you can see where I have started to pull out the "weft" threads to give me more space to sew the ryijy.
This process took me three days to do. It was a long process to do this, so if you are looking for a cheap cost affective method this would be it, but if you are charging your customer for the hours worked on ryijy, this is going to cost the customer more up front cost, but the customer will save on hourly costs.

Finally.... all the pre planning and prepping for the ryijy is over. I can finally start to make this project.
In the above picture you can see the tools needed for this project. I have my hand drawn pattern to follow, and I have my sample piece to help me see the goal.

In the picture to your right you can see the marking I have. I have also marked off every 10 cm across the rug. That helped me to follow the pattern I had made.

When I first started making the ryijy. One row took me one hour to do, but as time went on I found that I could sew it faster. On average it took about 45 minutes per row ( the rows are 100 cm wide). I decided that I would sew 5 rows per day. It took alot of determination to sit and work on it that long every day.I found my back and shoulders were getting tired of the hunched position. For that reason I took a break once a row was done and spent this time to stretch and walk around.

In the picture to your right you can see the spaces in between each row. It wasn't the 5 cm space gap that I had originally planned for, but it still worked. The ryijy was not to full looking in the end.

The ryijy is coming along fine. Fortunately I had a beautiful view outside to gaze on occationally.

Here is a picture of the back side of the ryijy. It is very important that the back is as neat as the front side.

I am really liking the way the ryijy is turning out.
Also a bonus is that I absolutely love making it. It is something that I am going to seriously get into.

To the right you can see that I have reached the half way point in making the ryijy. So far it has taken me 3 weeks to get to this point.
I am staying on schedule. I promised the customer that it would be ready in 6 weeks.

What I had failed to mention earlier is that after each row is sewed I cut them open. Some people don't do it that way. They leave the cutting part to the very end. For a" newbie" in this ryijy making I found that cutting after each row worked well for me.

As I am approaching the last few rows of sewing the ryijy, I found that it was so heavy that it kept sliding off the table. So I invented a way to hold it in place while I sew. It worked fabulously.

Once my ryijy was complete I had to sew s binding tape to support the rod once it is put hanging on the wall.

After the binding tape I sewed the side seams down on the backside of the ryijy. To sew the seams I used the strings that I had pulled from the weft. Nothing got wasted.

Here is the back view of the completed ryijy. It looks so neat and tidy.

In the above picture if you look at the bottom right hand corner you can see the hand embroidered name of the designer and maker of the ryijy. Also you can see the date to was made.The name of the ryijy is called " etäisyys". I chose this name for the ryijy ( which by the way it is common to name your ryijy) because I made it while I was etänä from my school and classmates. ( etäisyys means distance in english)

Above is a picture of the ryijy in the customers home. I feel it fits very well into the furniture style and decor of the home.

It sits very nicely on the wall that it was designed for. The customer was very happy with the ryijy as was I.

One " satisfied" customer.. ( and designer)
Thursday, October 15, 2020
EMBROIDERY

I decided that we needed a sauna pillow for our sauna. I made this little tonttu to match the sauna bench towel we had been given as a gift. As you can see I enbroidered the picture first on the linen.

Here I am finished embroidering the picture and have sewed on the zipper.

The back of the sewn pillow.

The sauna pillow is on the top picture and the laudeliina is the lower picture. I think I came pretty close in matching them.
There are so many many crafts that I have done in the past two years, but unfortunately I have forgotten to take pictures of them.
My
leisure time is spent planning, designing, and making crafts. Most are
for family and friends, and others I have made for customers.
Thursday, September 24, 2020
CUSTOM MADE AND DESIGNED "SAUNA BENCH TOWELS AND SAUNA HATS"
In the next course for school we needed to have a customer to make a product for, and I was lucky because I had been approached by a customer who requested that I make for her " four sauna bench towels" and two felted sauna hats.
She had seen a picture I had posted online of a sauna bench pillow that I had made. She loved the picture on it, and wanted that picture to be on the bench towels. Unfortunately due to copyright laws I could not copy and sell the same picture. I explained this to her, and said that if I changed the picture (s) I could then make them for her without breaking any copyright laws.
I had also suggested that I could instead make some bench towels with birch trees ( which are totally my thing) but she said no... they are going to be given as a present to someone who does not have birch trees at their cottage.
Now I started the process of drawing and designing pictures for the sauna bench towels.

This was the original picture that she wanted on the bench towels.

Here is the bench towel where I got the original copy from. I used these three pictures as a base to make my version for the new "sauna bench towels".
I drew four different pictures of each "knome". Below are a a few samples of the different drawing I drew for my customer.

I took the idea and tried different versions.


The customer liked them and was ready to order the bench towels.
However.. before I started making them I spoke with my teacher and she recommended that I make some bench towel drawings that are more my taste and style, and present these drawings to the customer as well. That way she has a larger range of different styles to chose from.
I had spent so much time drawing and planning these knome pictures that to start designing and drawing something totally new and different was an exhausting thought.. and to be honest at this point I just wanted to make the ones the customer had requested originally.
So... now I had to start from scratch again. Fortunately my idea of different trees was still in my thoughts, so I decided to make a series of four different types of trees found here in Finland.
Below you will see my drawings of the my " woodland series"

This is the first picture I drew for my " woodland series" it is of birch tree trunks. I am an birch tree fanatic. I love the shape,and the colours of them. They make me feel at peace. So... of course they were going to be the very first trees I pick for this series.

This drawing is the second one in my "woodland series". I have always loved the red pine trees here in Finland, so I knew that these had to be in my series. I drew these free hand and without any sample picture, I just thought about how they looked and drew that.
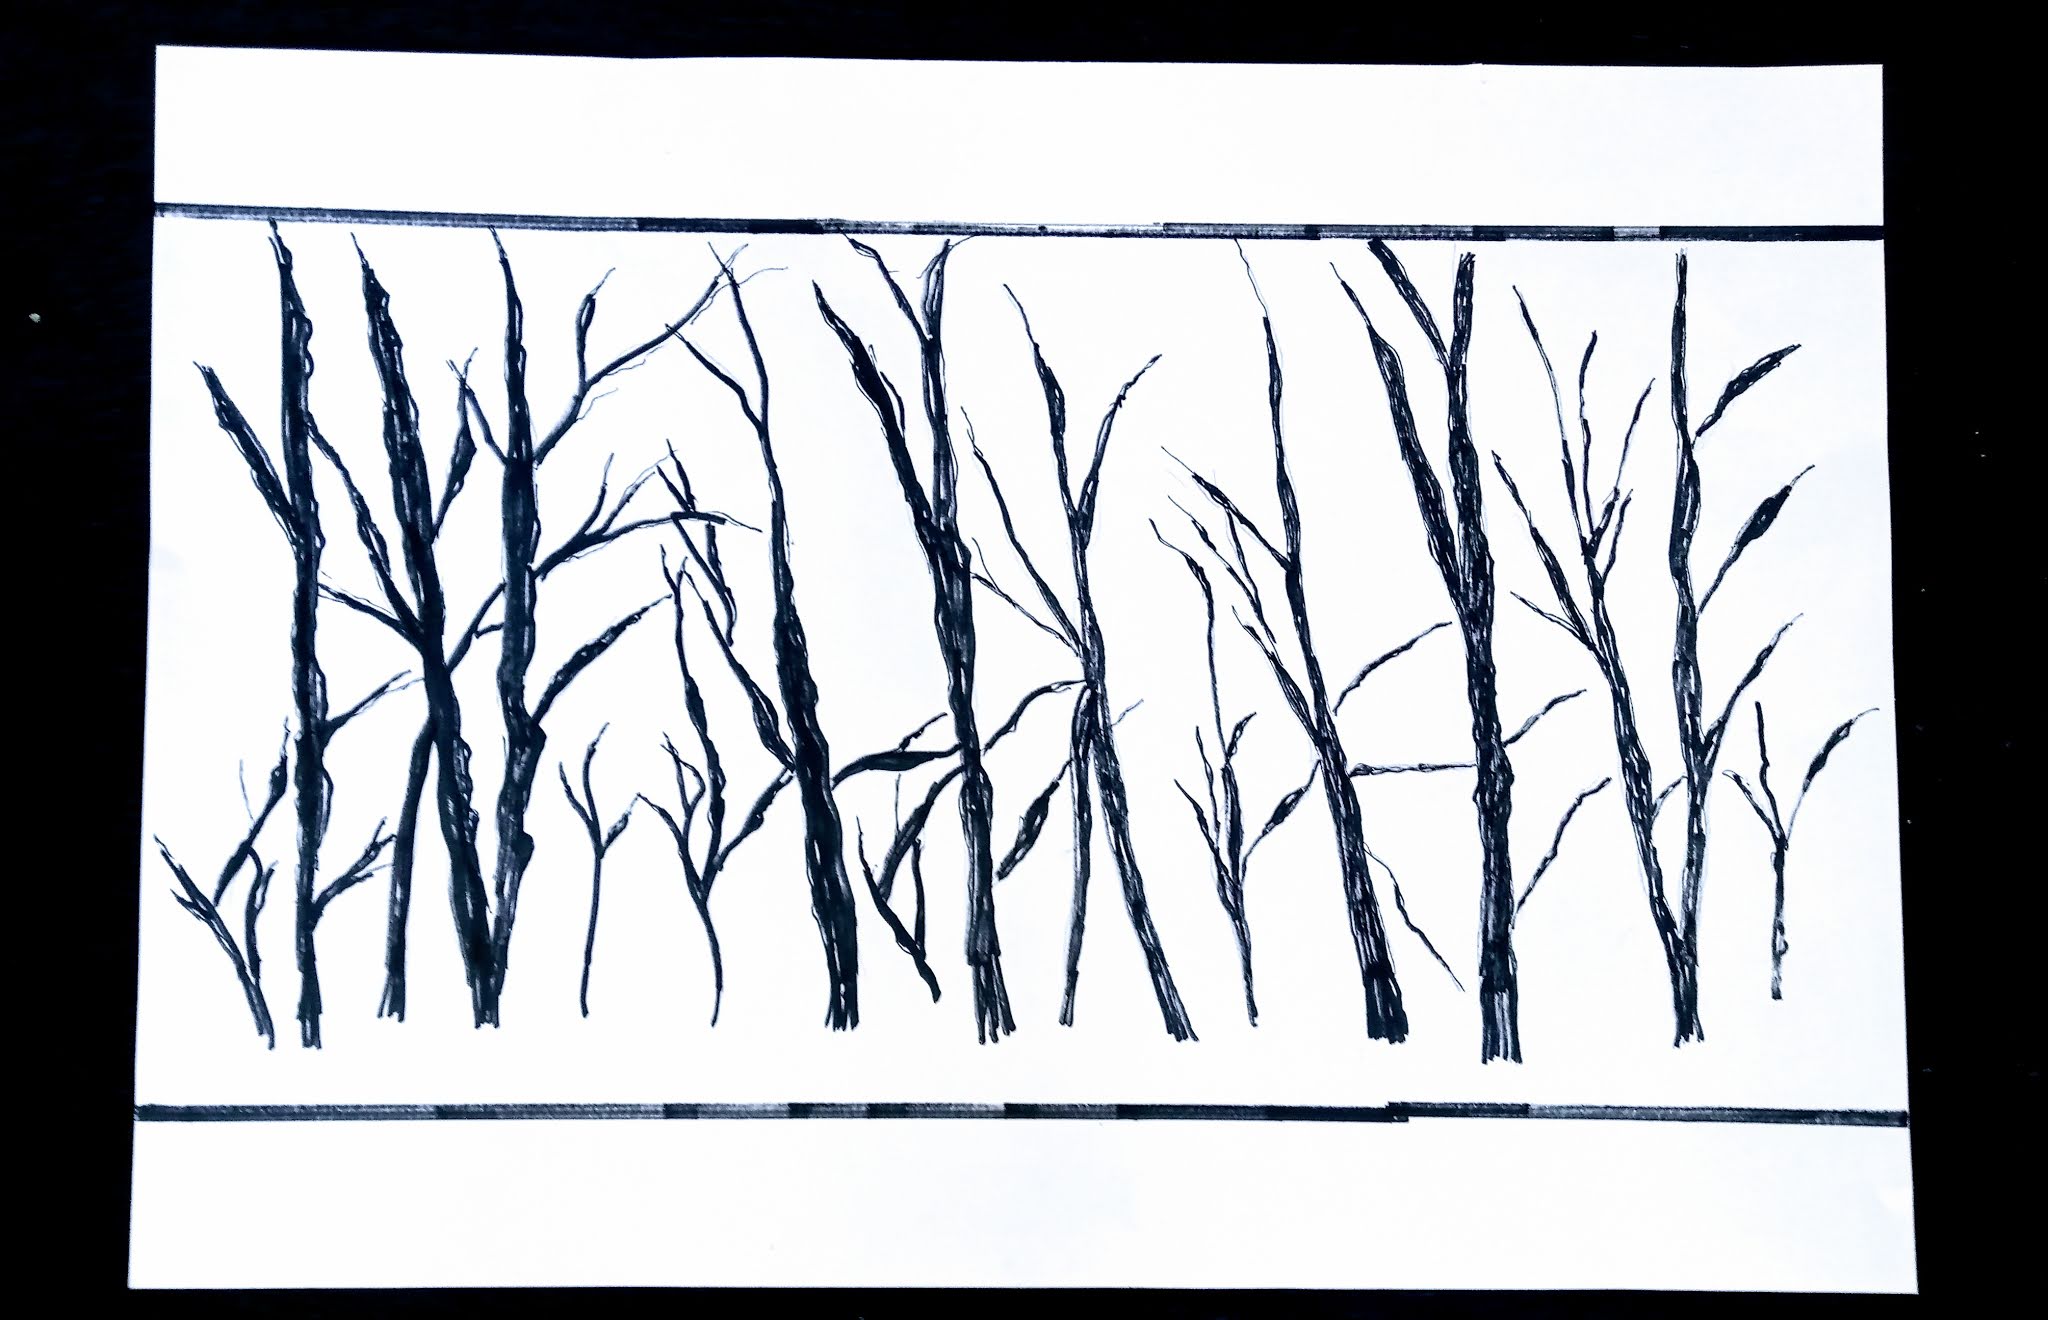
This is my third drawing for the "woodland series". I have always loved sticks and branches, and have them in my home continually. So... of course I had to draw a picture of forest scrub.

For this last picture of my "woodland series" I wanted to have spruce trees. Unfortunately I could not get a spruce tree that I liked. I tried drawing many different shapes of spruces, but none of them suited the rest of the series. Finally... I found a sample of the type of spruce I wanted and started to draw. This is how they came out. I was so happy with the result.
I now have many more pictures to show my customer, while drawing the "woodland series" an idea came to mind about another series and I just had to draw these as well to present to my customer.
This series is called the " Canadian series".

The customer lives in Canada. Even though they are finnish and are building a finnish sauna, I thought that maybe they would want something Canadian in the sauna as well.
The famous " Canada goose".. was the first picture in my "Canadian series"

The next picture I chose for my " Canadian series" was the Arctic wolf.

My third picture in this series that is the " inuksuk" that can be found in the great white north..

Finally my last drawing for the series just had to be the reindeer that roam the Northern hemisphere... both here in Finland and in Canada.
I was so excited to show my customer the drawings that she has to choose from. Let's see what she decides. I could hardly sleep because I was so anxious on which series she decides to pick. I really like the "woodland series".. it speaks to my heart and soul, but I also love the Canadian series. It was so totally unexpected, and I really didn't think I would love this series so much. It is probably because I am a Canadian as well. I can so relate to these pictures.
Well.... my customer decided and sent back the reply of which series I am to make the "sauna bench towels "from ... Can you guess which one she chose?
If you guess the " woodland series" you are correct. I have to say I was really surprised at that because I had suggested right from the beginning this series, but she said no. I guess once she had seen it she knew it would be perfect for the persons she was given them to.
So... anyways after this long explanation,we discussed and agreed on a price which included shipping to Canada.
Below you will see the steps involved in making these bench towels.

I first have to make a transparency of each tree picture. ( I will only show samples of one of these)

After making the transparency I put that on the screen and I used the technique of "light exposure" to print the pattern on the screen.
I do this expose to all four of my pictures. Then power wash off the exposed light and my screen is ready for use.

In this picture you can see I had printed my first picture on the linen towel.

Here is a picture of all four of the printed towels.

Completed "Woodland series" BIRCH bench towel.

Completed " woodland series" SPRUCE sauna bench towel.

Completed " woodland series" BRUSH sauna bench towel.

Last but not least the final " woodland series" PINE sauna bench towel.
I was so very very happy with how this series turned out. Also I am so happy that my teacher "encouraged" me to draw some designs of my own, for these bench towels.
Now those bench towels are completed I have to start drawing and planning the " sauna hats". These hats are traditionally made of felt, and used in the sauna to keep your head cool, which in turn keep your body at a cooler temperature in the sauna.
The sauna hat is used by many finns here in Finland, but the use of these hats is not so common in North American among the finnish popluation.
Well.. now I start my drawings.


In the drawing to your right, I drew a sauna hat with a beige base and then drew trees in black.

In this drawing I chose a beige base and black birch leaves as my design.

Here is a frontal view of the beige hat.

This hat has a black base and I used beige birch leaves as the design.

Here is a side view of the same black hat and birch leaves.
I submitted these drawing to my customer and they chose the Beige hat with the birch leaves for the female recipient and the black hat with the birch leaves for the male recipient.
Next I will show pictures of how I made the felted sauna hat.

In this picture I made the paper template of the hat. The template seems rather large, but when you start the felting process the felt shrinks and felts.

I have felted the hat to a stage where I can start adding the black felted decorations.
I changed the pattern a tad.. I added branches to the birch leaves.

I made the branches and then added the birch leaves in the black felt.

At this stage I put the hat on a head mold to start shaping the hat. The head mold makes it so much easier to make and mold the shape. I also let it dry on the mold.

Frontal view of the molding process.

I did the same process with the black hat. It is now drying the the head mold.

Here is a picture of the both the finished hats.
They turned out just how I had imagined.

Here is a picture of the finished Sauna hat. This hat is going to be given to a male recipient.

Here is a picture of the sauna hat for the female recipient.
My last step was to package and send the Sauna Bench towels, and the Sauna hats to my customer in Canada. This project was started on Sept 24,2020 and completed and sent on November 3 2020.
p.s. The recipients of these items were very PLEASED.... They absolutely LOVED THEM...
Subscribe to:
Posts (Atom)
-
 I have set a goal for myself, that I am going to try to make one new birch felt scene every week. To be honest, it is much harder to get in...
 -
I have to admit that I have not done any felting for over a year. With the Textile Artisan school I had been attending for the past two year...


