In the next few weeks we have the opportunity to chose different weaving techniques such a "card weaving, rope braiding, tufting. etc.... I mentioned rope braiding but unfortunately I forgot to take pictures of the different rope knots and braids that we learned.
I chose to do shuttle weaving first. I figured it was the easiest weaving to learn first.
My first" woven ribbon" is not something I could use or sell, but it was a good opportunity to try a new craft.
In the picture to your right I am setting up the small loom.
Here you can see how the process works. I tie both ends of the strings to something that does not move, and that way the strings stay tight so I can weave on it.
Here you can see a close up the the woven ribbon
I chose "card weaving" as my second ribbon technique. This one was more difficult for me to learn. I kept turning the cards in the wrong direction.
Here is a good example of the mess I am making with the card weaving. There is supposed to be a pattern, but unfortunately it really is a hit and miss on the pattern.
Here is a close up view of my card weaving. My pattern is constantly changing. I don't think it is supposed to be like that.
Here is a picture of my weaving attempts. I showed only the parts of the ribbons that worked out.
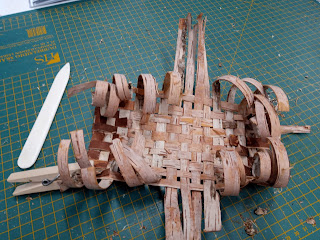
I decided to try basket weaving for my third technique. Unfortunately I did not have fresh birch bark for this attempt. I first soaked the bark in hot water overnight to make it more pliable to work with.
In this photo to your right you can see that my bark is drying up and curling which made it really difficult to work with.
I did not have alot of birch bark to work with so I landed up making a small birch bark credit card holder.
Next I wove a basket out of recycled material. The material now has the look and texture of felt. This basket is kinda " blahhh".
Here is another weaving technique I tried. You use a crochet hook which has a needle eye on the other end. This method can be called " latch hook" weaving.
This is the last technique that I tried. It is also called " latch hooking".. I really enjoyed making this picture. Once I got the hang of how the hook worked the picture came about very quickly.
My last technique that I tried was " latch hooking " . In this picture below you can see the picture that I am going to make on my fabric in latch hooking. The red picture is showing the colours I am going to use in this technique.
To the left you can see the red pattern appearing. Once I learned how to use the latch hook machine it became very quick and easy to make my picture.
The only thing I was not prepared for was the amount of wool it took to make this project.
To your right is the finished project. I was really happy with how it turned out.
Here the pillow is on our couch. I will put this pillow out for the Christmas season.


No comments:
Post a Comment