Thursday, September 24, 2020

CUSTOM MADE AND DESIGNED "SAUNA BENCH TOWELS AND SAUNA HATS"

 In the next course for school we needed to have a customer to make a product for, and I was lucky because I had been approached by a customer who requested that I make for her "  four sauna bench towels" and two felted sauna hats. 

She had seen a picture I had posted online of a sauna bench pillow that I had made. She loved the picture on it, and wanted that picture to be on the bench towels. Unfortunately due to copyright laws I could not copy and sell the same picture. I explained this to her, and said that if I changed the picture (s) I could then make them for her without breaking any copyright laws. 

I had also suggested that I could instead make some bench towels with birch trees ( which are totally my thing) but she said no... they are going to be given as a present to someone who does not have birch trees at their cottage.

 Now I started the process of drawing and designing pictures for the sauna bench towels.


This was the original picture that she wanted on the bench towels.


Here is the bench towel where I got the original copy from. I used these three pictures as a base to make my version for the new "sauna bench towels".

I drew four different pictures of each "knome". Below are a a few samples of the different drawing I drew for my customer.


I took the idea and tried different versions.


The customer liked them and was ready to order the bench towels. 


However.. before I started making them I spoke with my teacher and she recommended that I make some bench towel drawings that are more my taste and style, and present these drawings to the customer as well. That way she has a larger range of different styles to chose from. 

I had spent so much time drawing and planning these knome pictures that to start designing and drawing something totally new and different was an exhausting thought.. and to be honest at this point I just wanted to make the ones the customer had requested originally. 

So... now I had to start from scratch again. Fortunately my idea of different trees was still in my thoughts, so I decided to make a series of four different types of trees found here in Finland. 

Below you will see my drawings of the my " woodland series"


This is the first picture I drew for my " woodland series" it is of birch tree trunks. I am an birch tree fanatic. I love the shape,and the colours of them. They make me feel at peace. So... of course they were going to be the very first trees I pick for this series.


This drawing is the second one in my "woodland series". I have always loved the red pine trees here in Finland, so I knew that these had to be in my series. I drew these free hand and without any sample picture, I just thought about how they looked and drew that.
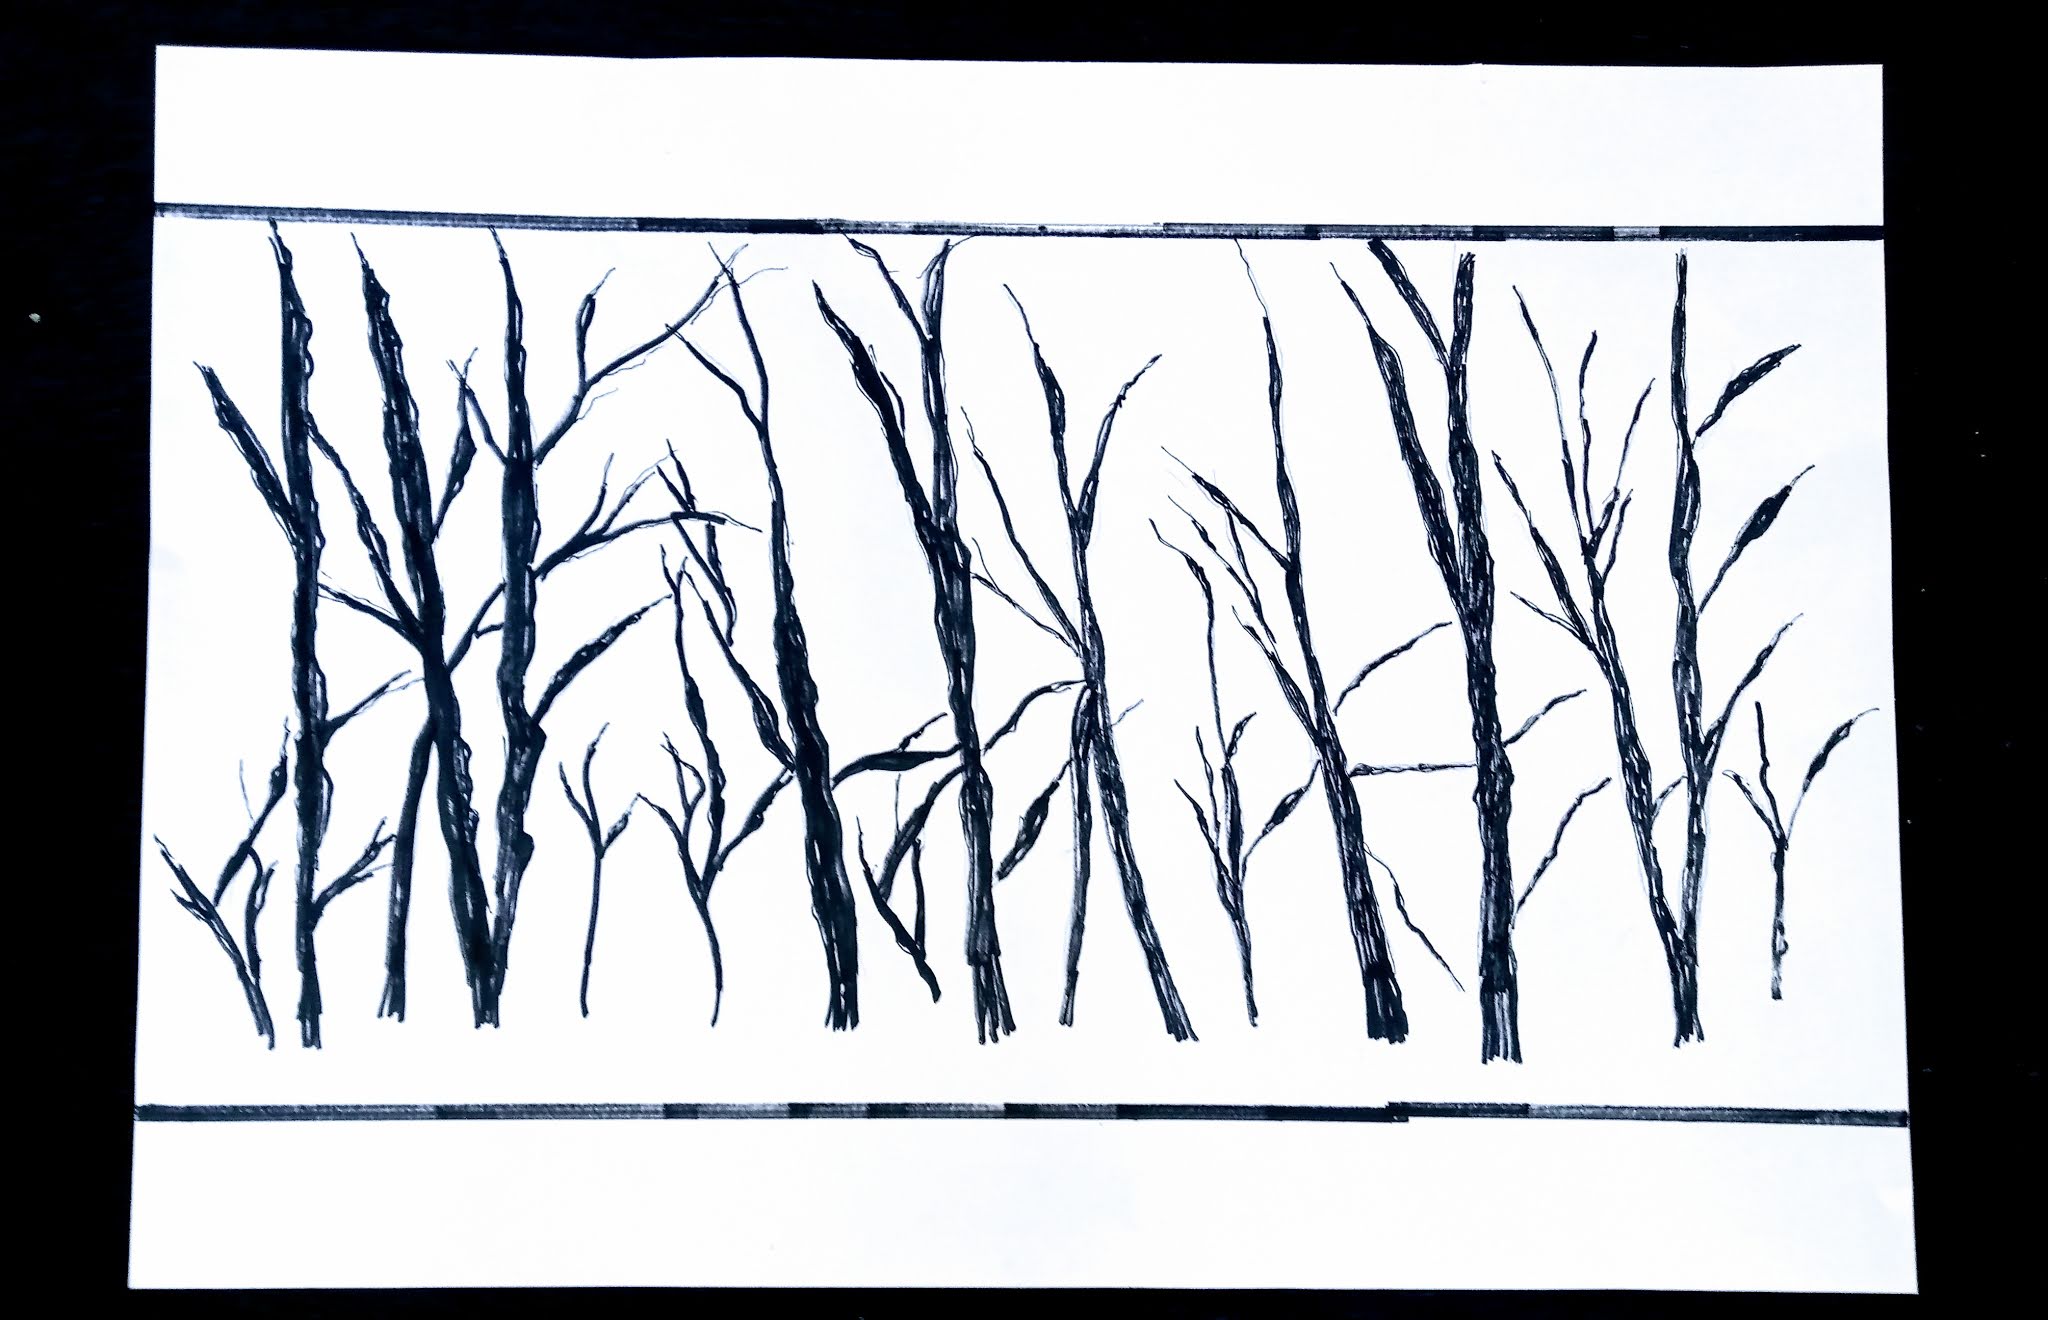

This is my third drawing for the "woodland series". I have always loved sticks and branches, and have them in my home continually. So... of course I had to draw a picture of forest scrub.


For this last picture of my "woodland series" I wanted to have spruce trees. Unfortunately I could not get a spruce tree that I liked. I tried drawing many different shapes of spruces, but none of them suited the rest of the series. Finally... I found a sample of the type of spruce I wanted and started to draw. This is how they came out. I was so happy with the result. 


I now have many more pictures to show my customer, while drawing the "woodland series" an idea came to mind about another series and I just had to draw these as well to present to my customer. 

This series is called the " Canadian series".


The customer lives in Canada. Even though they are finnish and are building a finnish sauna, I thought that maybe they would want something Canadian in the sauna as well. 

The famous " Canada goose".. was the first picture in my "Canadian series"


The next picture I chose for my " Canadian series" was the Arctic wolf.


My third picture in this series that is the " inuksuk" that can be found in the great white north..


Finally my last drawing for the series just had to be the reindeer that roam the Northern hemisphere... both here in Finland and in Canada.


I was so excited to show my customer the drawings that she has to choose from. Let's see what she decides. I could hardly sleep because I was so anxious on which series she decides to pick. I really like the "woodland series".. it speaks to my heart and soul, but I also love the Canadian series. It was so totally unexpected, and I really didn't think I would love this series so much. It is probably because I am a Canadian as well. I can so relate to these pictures. 

Well.... my customer decided and sent back the reply of which series I am to make the "sauna bench towels "from ... Can you guess which one she chose?

If you guess the " woodland series" you are correct. I have to say I was really surprised at that because I had suggested right from the beginning this series, but she said no. I guess once she had seen it she knew it would be perfect for the persons she was given them to.

So... anyways after this long explanation,we discussed and agreed on a price which included shipping to Canada. 

Below you will see the steps involved in making these bench towels.


I first have to make a transparency of  each tree picture. ( I will only show samples of one of these)


After making the transparency I put that on the screen and I used the technique of "light exposure" to print the pattern on the screen.

I do this expose to all four of my pictures. Then power wash off the exposed light and my screen is ready for use.  


In this picture you can see I had printed my first picture on the linen towel.

Here is a picture of all four of the printed towels.


Completed "Woodland series" BIRCH bench towel.


Completed " woodland series" SPRUCE sauna bench towel.


Completed " woodland series" BRUSH sauna bench towel.


Last but not least the final " woodland series" PINE sauna bench towel.

I was so very very happy with how this series turned out. Also I am so happy that my teacher "encouraged" me to draw some designs of my own, for these bench towels. 


Now those bench towels are completed I have to start drawing and planning the " sauna hats". These hats are traditionally made of felt, and used in the sauna to keep your head cool, which in turn keep your body at a cooler temperature in the sauna. 

The sauna hat is used by many finns here in Finland, but the use of these hats is not so common in North American among the finnish popluation.

Well.. now I start my drawings. 

This sauna hat's design matches the sauna bench towels.  I chose a black base, and then drew trees in a beige colour.


In the drawing to your right, I drew a sauna hat with a beige base and then drew trees in black.

In this drawing I chose a beige base and black birch leaves as my design.


Here is a frontal view of the beige hat.


This hat has a black base and I used beige birch  leaves as the design.


Here is a side view of the same black hat and birch leaves.


I submitted these drawing to my customer and they chose the Beige hat with the birch leaves for the female recipient  and the black hat with the birch leaves for the male recipient.

Next I will show pictures of how I made the felted sauna hat.


In this picture I made the paper template of the hat. The template seems rather large, but when you start the felting process the felt shrinks and felts.


I have felted the hat to a stage where I can start adding the black felted decorations. 

I changed the pattern a tad.. I added branches to the birch leaves.


I made the branches and then added the birch leaves in the black felt.

At this stage I put the hat on a head mold to start shaping the hat. The head mold makes it so much easier to make and mold the shape. I also let it dry on the mold.

Frontal view of the molding process.


I did the same process with the black hat. It is now drying the the head mold.


Here is a picture of the both the finished hats.

They turned out just how I had imagined.


Here is a picture of the finished Sauna hat. This hat is going to be given to a male recipient.


Here is a picture of the sauna hat for the female recipient.


My last step was to package and send the Sauna Bench towels, and the Sauna hats to my customer in Canada. This project was started on Sept 24,2020 and completed and sent on November 3 2020.

p.s. The recipients of these items were very PLEASED.... They absolutely LOVED THEM...

Monday, August 31, 2020

RIBBONS WEAVING/ ROPE BRAIDING /TUFTING TECHNIQUES..

In the next few weeks we have the opportunity to chose different weaving techniques such a "card weaving, rope braiding, tufting. etc.... I mentioned rope braiding but unfortunately I forgot to take pictures of the different rope knots and braids that we learned.

I chose to do shuttle weaving first. I figured it was the easiest weaving to learn first.

My first" woven ribbon" is not something I could use or sell, but it was a good opportunity to try a new craft.


In the picture to your right I am setting up the small loom.


Here you can see how the process works. I tie both ends of the strings to something that does not move, and that way the strings stay tight so I can weave on it.


Here you can see a close up the the woven ribbon


I chose "card weaving" as my second ribbon technique. This one was more difficult for me to learn. I kept turning the cards in the wrong direction.


Here is a good example of the mess I am making with the card weaving. There is supposed to be a pattern, but unfortunately it really is a hit and miss on the pattern.


Here is a close up view of my card weaving. My pattern is constantly changing. I don't think it is supposed to be like that.


Here is a picture of my weaving attempts. I showed only the parts of the ribbons that worked out.


I decided to try basket weaving for my third technique. Unfortunately I did not have fresh birch bark for this attempt. I first soaked the bark in hot water overnight to make it more pliable to work with.


In this photo to your right you can see that my bark is drying up and curling which made it really difficult to work with.


I did not have alot of birch bark to work with so I landed up making a small birch bark credit card holder.


Next I wove a basket out of recycled material. The material now has the look and texture of felt. This basket is kinda " blahhh".


Here is another weaving technique I tried. You use a crochet hook which has a needle eye on the other end. This method can be called " latch hook" weaving.


This is the last technique that I tried. It is also called " latch hooking".. I really enjoyed making this picture. Once I got the hang of how the hook worked the picture came about very quickly. 


My last technique that I tried was " latch hooking " . In this picture  below you can see the picture that I am going to make on my fabric in latch hooking. The red picture is showing the colours I am going to use in this technique.


To the left you can see the red pattern appearing. Once I learned how to use the latch hook machine it became very quick and easy to make my picture. 

The only thing I was not prepared for was the amount of wool it took to make this project.


To your right is the finished project. I was really happy with how it turned out.


Here the pillow is on our couch. I will put this pillow out for the Christmas season. 


Thursday, August 27, 2020

DAY TRIP TO CRAFT BOUTIQUE


I and a few of my classmates had a wonderful opportunity offered to us. Our teacher asked us students if anyone was interested in spending a day at a Taide shop.. We would have to opportunity to ask the owner  questions about owning and running a business here in Finland. We would also have the opportunity to have a workshop creating and making an item for ourselves from her supplies at her store.

 What a golden opportunity this would be. So... off we went with a car full of women. We spent the morning going through her shop, and seeing what she sold there. Most of the crafts she her partner or her mother had made. They had a whole workshop set up for printing fabrics, weaving, felting, etc. 

She also spent alot of time telling us how she started up her shop and the difficulties that came her way, and how she overcame them. We also had a chance to ask her alot of questions about setting up a business etc. 

In the afternoon we got to work on our own projects... She gave us boxes full of materials to work with, which where full of wonderful colours and wool that I had never worked with.. I knew that I wanted to try these materials so I decided to make a felted picture.  


I am not a huge blue fan, but I just had to try these wonderful metallic blues that she gave us to work with. I used them as my background sky for this birch grove picture.


        In the picture below you can see closer the colours used. 

 Even though these are not my most favorite colours, I have grown to love this piece. Now... I just need to find the right place to display it.


It was a wonderful day that I spent with friends and classmates. It was also a really good learning experience for us all. 

Kiitos ihanasta päivästä Villakammari...

Monday, August 24, 2020

MACHINE/HAND EMBROIDERY


Our classes on embroidery continue. This week we will be taught different machine embroidery techniques. The first technique I wanted to try was " water soluble film embroidery". In the pictures below you can see this technique.

 The beige leaf sample was my first attempt at this technique. It was actually quite fun.


I also did just plain machine embroidery, which was a lot of fun. Here are a few sample pieces that I made.

                    In the above picture you can see the sample pieces of machine embroidery.


In this picture I machine embroidered using both of the techniques I learned. You can see in the taller stalks of wheat the water soluble technique used. It shows white through the picture but that is only the white table your seeing through the wheat. I was very pleased with the end result of my first attempts of machine embroidery.


I also tried the machine embroidery on a felted picture that I had made earlier on in the year. I had never been quite happy with this felted picture, so I thought that the machine embroidery might improve this picture. It truly did. The grasses now seem to pop out of the picture. 

Now.... all I have to do is buy a sewing machine that does embroidery....


HAND EMBROIDERY

Our second year of school has begun. After being homeschooling since March  ( due to Corona Virus) it felt surreal to be at school again. So, anyways...this fall we began our schooling with hand embroidery techniques. 


I loved embroidery this wheat design. It is so simple yet so lovely. It's funny that I have never really done any embroidery on my clothes.


Here is a fun way to cover up holes, and patches in your jeans. 

These are 2-3 day courses that we get to try our hand at these different techniques.

Monday, May 4, 2020

WORK PLACEMENT ( TYÖKOKEILU) at TIKKIVERSTAS


For our school curriculum we  all have to do a 4-8 week work placement in the textile industry. We could find it ourselves or the school had a list of companies that we could contact for the job placement. This had to be at a  textile store or museum, textile manufacturer to get onsite work training.  

I had decided that I would go to different shops that I would like to do my placement at. On my way to school I pass this lovely little upholstery shop everyday and I decided that I will go in there and ask if they would be interested in having me do my job placement there. I spoke with the owner and after explaining who I was and what reason I was coming into her store, she said that she would love for me to come there and do my placement. She had in the past offered this service to other students in our school. 

Even though many shops were closed due to Corona Virus she still kept her store open so I was able to do my job placement. 

I was so nervous going to work on my first day. Firstly I was afraid that my limited finnish language would become a deterrent. As I headed off for my first day all kinds of worries stressed me out ... what if I did not understand what she was explaining to me? what if I misunderstood her and made the articles incorrectly? What if? what if??

 Once I got there we went through all the different machines she had there, and how they worked. She also told me what type of customer base she had. She sold some crafts there, but mainly she did furniture upholstery.. 

We discussed what she wanted me to work on while I was there for the month. She told me that she sold a lot of tote bags there, and wanted more of them. So, I was to design and make as many tote bags as I could during the month. She also asked if I would be interested in upholstering some ottomans for her.

Yipeee...This was going to be a great month..


This red tote bag is one of the first tote bags I made. I haven't sewed with leather so it was a learning experience. I also didn't have a pattern for this bag, so I looked at one of my tote bags at home and took a pattern from there. The selection of bag below show different fabrics. The fabric and leather were remnants of upholstery projects she had done for past customers. 


I love this black and white bag. It turned out as I had envisioned. On the opposite side of the bag, the colours are reversed. The white is one the top and the black is on the bottom.


The blue bag to your right did not work out at all. I don't like the colour or the leather pocket I sewed on it. The leather looks old and used.


This bag to your left is one of my favorites. It is chic and modern.


This was a fun bag to make. I took a part a pillow that had faded in the store window by sunlight, and used the inside fabric to make this fun bag. It turned out great. The owner was also surprised at my inventiveness .

The bag to your left is a bag that I made from little strips of remnant fabric. This fabric is well know in Finland. It is called ARTEK It sells for about 400€ per meter. It is used to upholstery chairs etc. I did not have enough pieces so I sewed a leather strip in the middle.

I was very pleased with the outcome, and the owner said I could take this bag for myself. I was so..... thrilled.


In the back I used black material, and then sewed a strip of the zebra fabric down the back of the bag. It actually landed up looking very presentable on both sides.

I also used the same fabric to sew these bags. At the time that I sewed this bag to the left, I did not realize the cost of this fabric.

I sewed leather sides on this bag.


The bag to your right was one that I made for the owner. She had asked me to make her a bag from this fabric. She wanted it to have long shoulder straps, and a larger tote bag.


She also requested that I make a zipper on it. I had never sewed anything this complicated without a pattern.. (Let alone the stress of ruining the expensive bag). But she was so pleased with the outcome. ( as was I....)


Well... all the bags were so at this point,so she asked if I would like my hand at upholstery. I was so elated. I have upholstered one chair in my life, and I enjoyed it so much that I always wanted to take an upholstery course. 

Now I get to do it for free.. 

In this picture I first glued stuffing on the styrofoam block then sewed the outer fabric and pulled it on the block... Now I am ready to finish the bottom of the block.


The completed ottoman. I was so pleased with the end result.

This will be going into the store window..


The owner was so pleased with my first ottoman that she asked if I would be interested in making one for an order she has from a customer. 

To be honest... I was really nervous making this one, it was sewing on a faux leather, and if you make a mistake the whole fabric has to be tossed. Because on any leather product the sewing lines with not disappear.

As you can see I took on the project.I measured and marked every single line I had to sew.The leather top was to be a checkered look.


In this picture you can see the light chalk marks I made to sew along.Once this is completed the chalk marks rub off with a wet cloth.


In this picture to your right you can see that I have prepared the styrofoam block with the padding, and sewn the sides. I am checking to make sure the fabric is nice and snug on the block.

Now I just need to sew on the top and hand sew the bottom piece.


Here I am fitting and planning the sewing of the top of my ottoman. This has to be just perfect. I only get one shot to get it right. 


The top is now sewn on.. It looks perfect. Like a professional had done it. ( the customer will never know that it was sewn by a student)


I hand sewed the bottom fabric.. It was quite tricky because you had to pull, hold, and sew at the same time. 


Time had flown by so quickly working at Tikkiverstas. I cannot believe I only have one more week at the store. 

I was thinking of what small project could I take on this last week, and then I remembered that the owner had in passing mentioned that she had a winter coat that she would love for me to sew into a weekend bag for her. 

So... off I went on this last project.. The coat was luckily a large one, so I had plenty of material to work with. Here is a side view of the overnight bag.


In the photo above you can see how width of the bag.


In the right had picture you can see that I added extra pockets, hand straps, and a shoulder strap.


The owner was so very very happy that I had a chance to make this overnight bag. She has planned on making it herself for sometime, but never had the chance. 


So..... to end this post of my work placement at Tikkiverstas I wanted to show a few pictures of my work displayed in the store window. 


To the right you can see first ottoman displayed in the front window of the store. This picture is taken from the inside of the store.


This photo is taken from the outside of the store.

The ottoman was made to match the green chair in the store window.


This photo is also in the store window. Here you can see some of the handbags that I made. 


To end this post, I just wanted to thank Tikkiverstas for giving me this wonderful opportunity to learn and grow here.